Plein Air Painting: Tips, Tools and Tricks Part 2
Hopes and Challenges
of Plein Air Painting
This article is the second of a series of three articles by Renee Rondon.
Where to Paint?
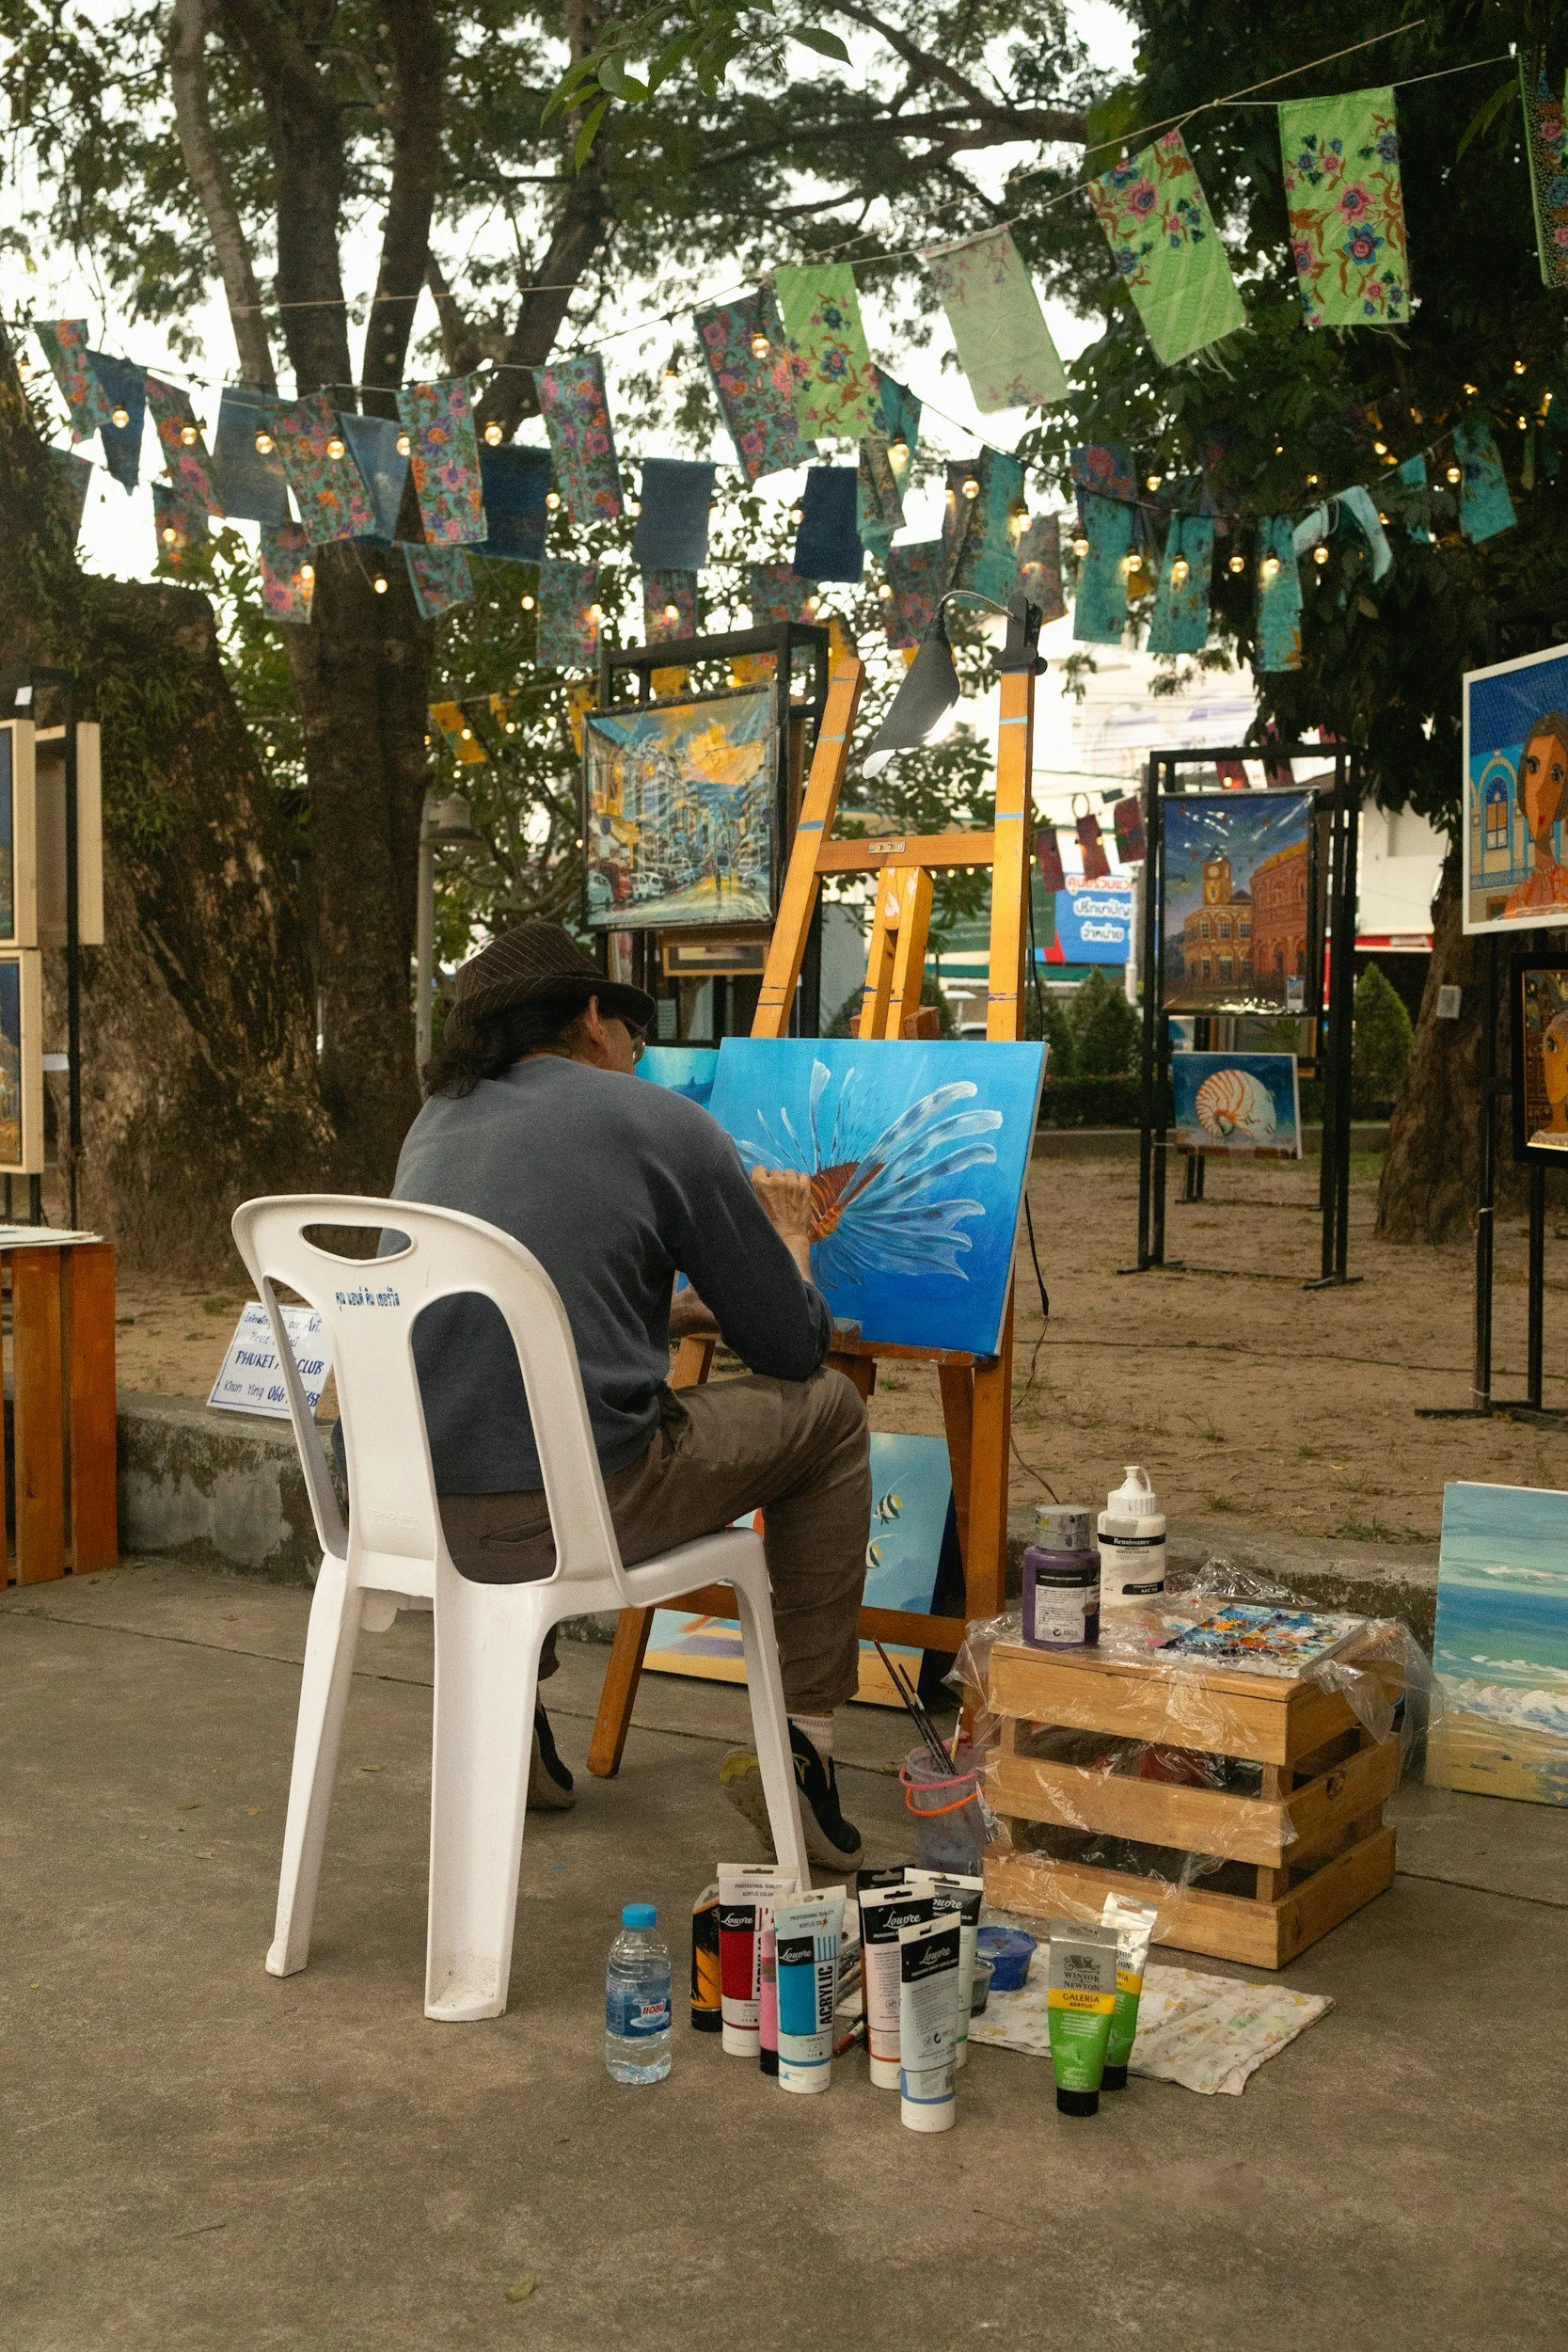
Where would you like to paint? We can easily get to cities or towns, fields, lakes and farms. Whether in our own backyard, traveling throughout the states or Europe, we can get nearly anywhere our painting heart desires. With modern equipment, paint supplies, and phones or cameras, we can face the challenges and wonders of plein air painting in nature whenever we like!
There are challenges, though. We do have busy roads, too many people/dogs/radios in some places, and many other distractions. Often, we want that busy street, or town, but it’s no wonder a lot of us opt for more remote places where we can zone in and concentrate on the pleasures of plein air painting. Wherever you paint, it will be an experience that you’ll probably never forget and will hopefully enjoy.
We are so hopeful when painting outdoors. We’d like to create a finished piece, ready to sell, even a masterpiece! If it’s a “study”, we hope it’s worthy to sell or work on in our studio. However, that often isn’t the case. The reality is that we deal with a lot outside. This includes driving to our destination, walking with our equipment to the perfect spot, then setting up. Then we need to find the very best composition possible! And don’t forget to take time for pictures to use later. This is a lot before we even start painting!
Paint Small
One trick is to paint small, such as canvas or canvas boards that are 6”x6”, 8”x10” or 9”x12”. Having fought the battle of trying to finish on larger canvasses, I now opt for smaller ones that can be nearly finished in one outdoor session. Having done this, I leave with a much more satisfied feeling.
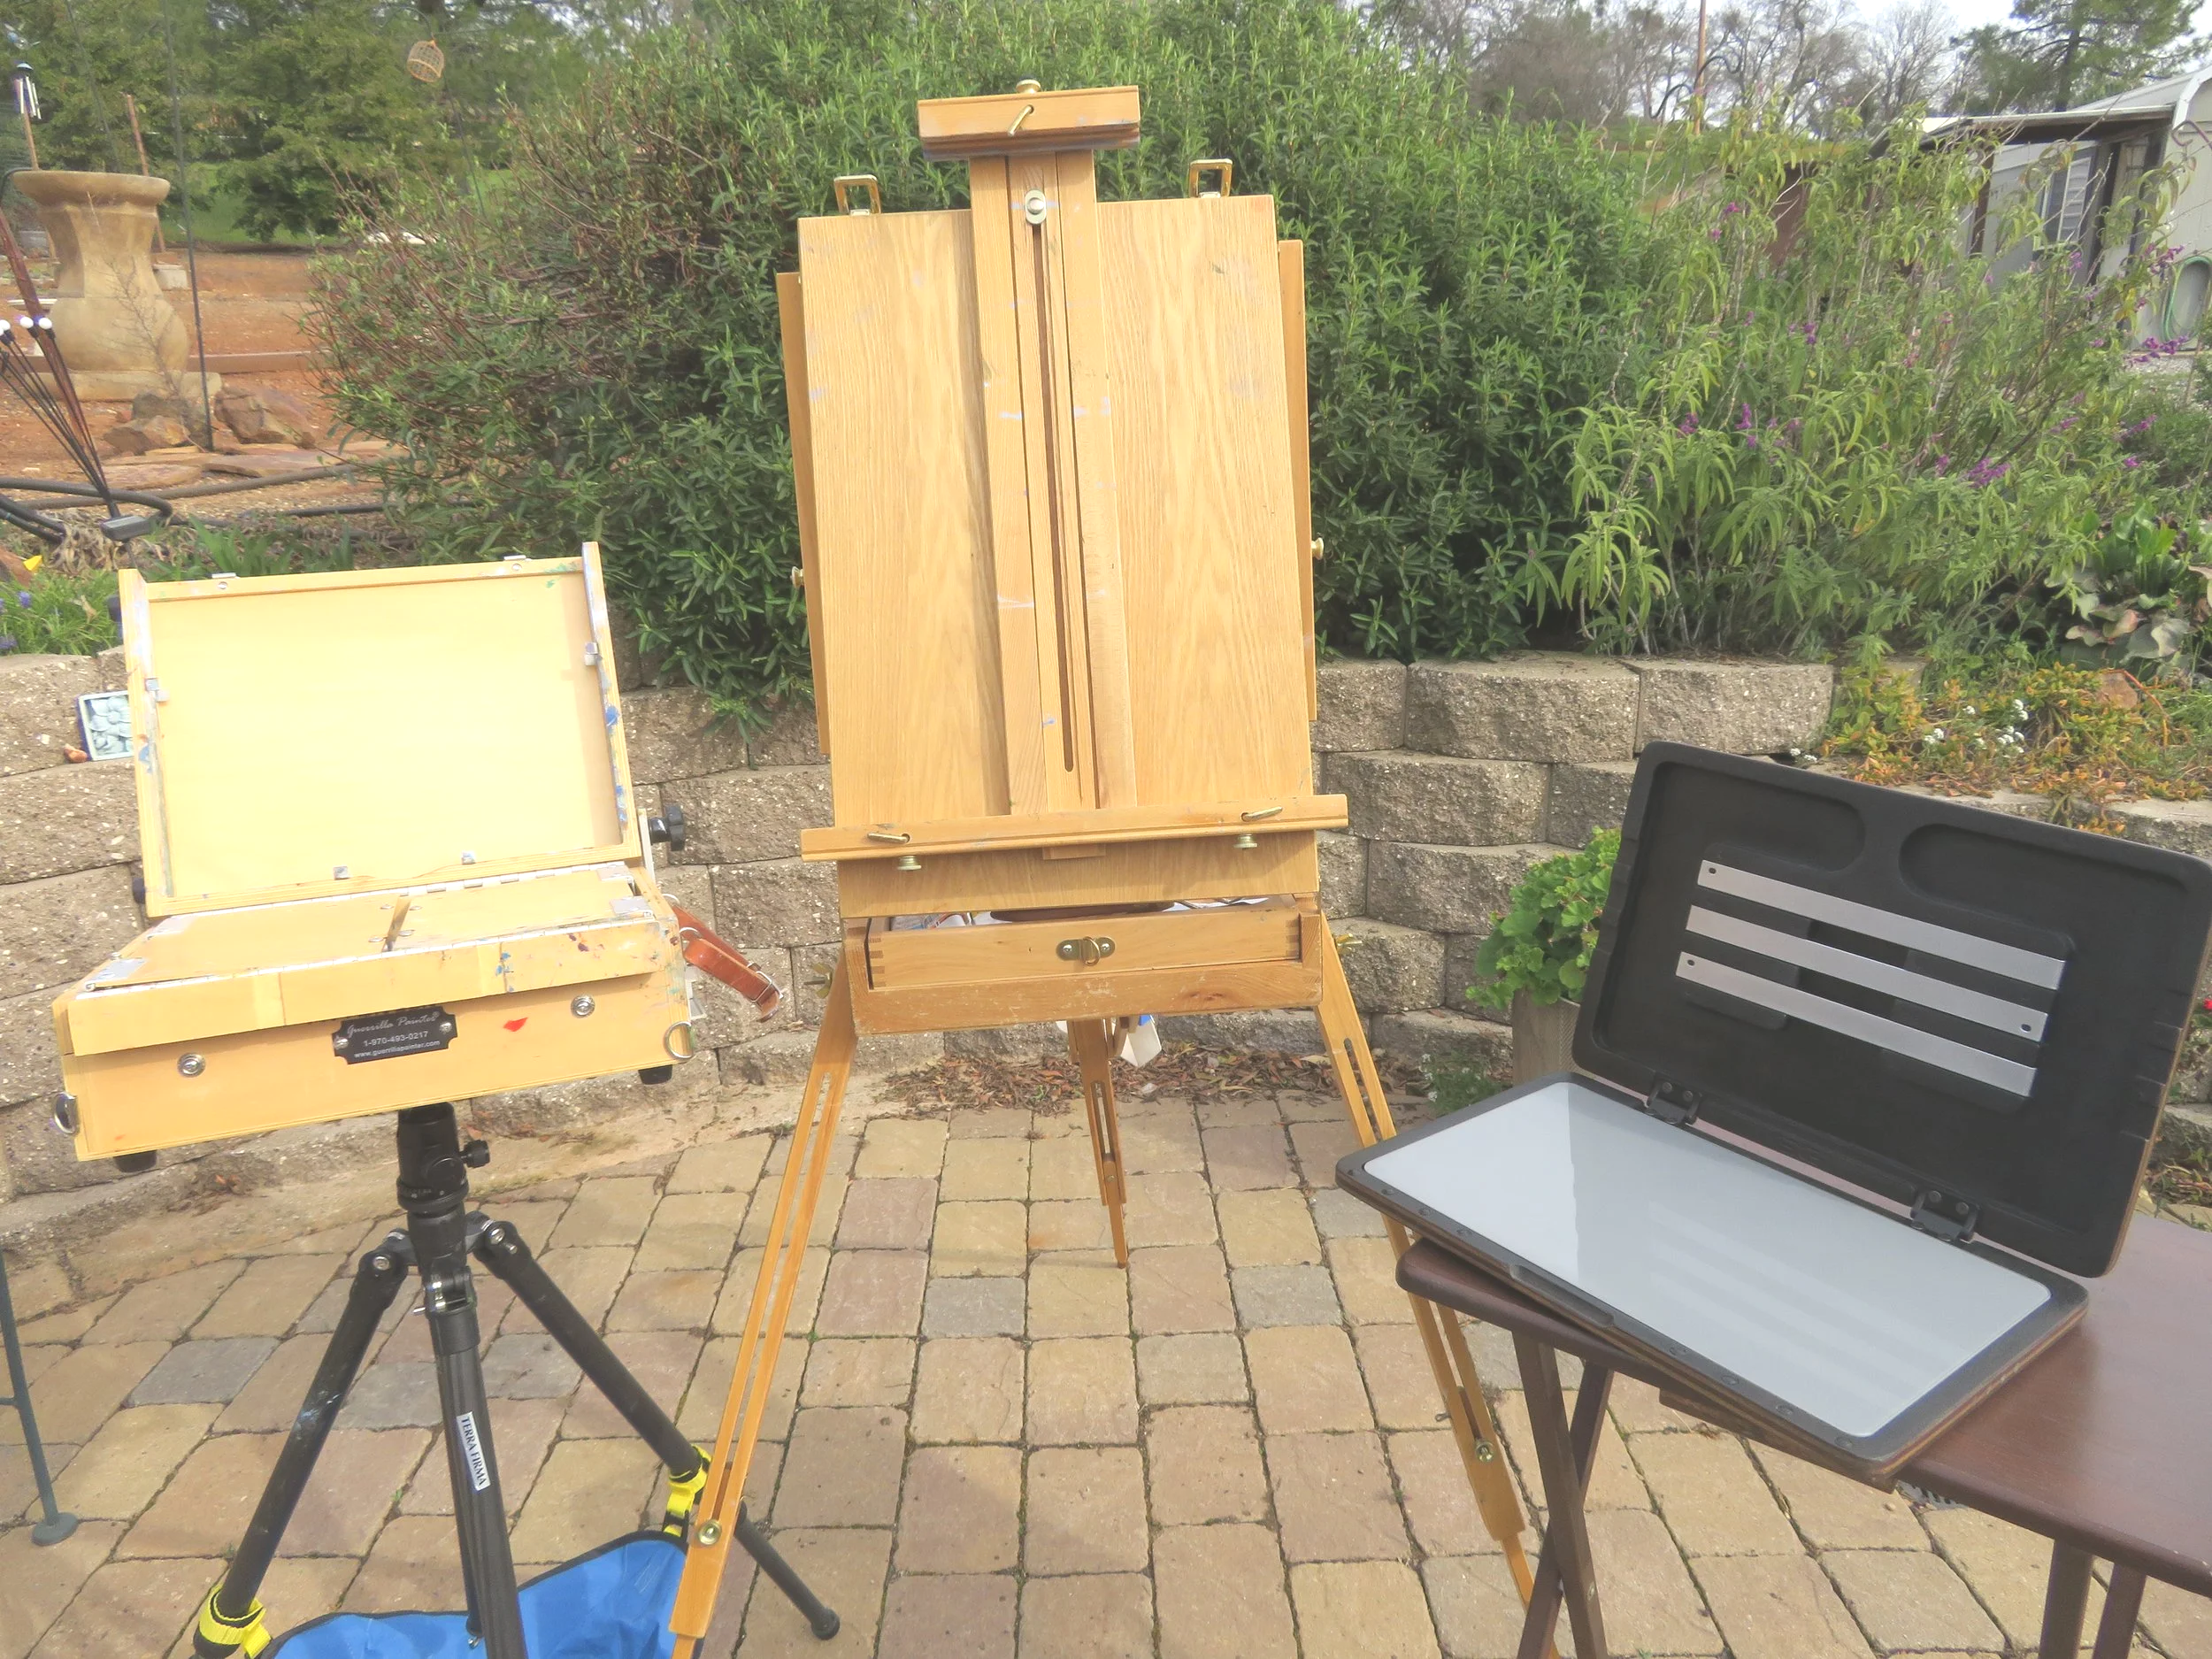
Before purchasing an easel, it’s a good idea to talk to fellow artists, check the size, weight, palette used for each, and whether a tripod or other support is needed.
Some Tools to Consider
There are tools and equipment that will make your venture easier and more successful. An easel, a backpack to carry brushes and other goods, and comfort items such as an umbrella, stool, drinks and more are just the essentials. Make a list of what you typically use to paint indoors and edit as you gain experience painting outdoors. Consideration of the bulk, weight, and how far you’re going to carry everything is also important.
One of the most important choices is what style of easel to choose. Depending on whether you’re painting with watercolors or oil, there are a great variety and types of easels. This includes a simple board to place paper or canvas on. Other choices are French easels, pochade boxes, and thin easels. Before purchasing, it’s a good idea to talk to fellow artists, check the size, weight, palette used for each, and whether a tripod or other support is needed. If you’re lucky and can try out one from a friend, that’s a huge help.
A Little Bit of History
Historically, most tripod easels have not changed a lot. They’ve gotten sturdier and weigh less but are very similar to what was available in the 17th century. There were other difficulties though, such as the artist Ludovic Piette who told Pissarro that “if a painter were to set up his easel in the street”, there could be serious consequences. A few were that the policemen “will accuse you of starting a riot…the crowd will block your view” and …”you might be run over by a carriage”. (*) How society views plein air painters has definitely improved.
Another piece of equipment that was developed around 1888 was paint boxes. They were sold in one catalog by Bourgeois Ainé, who also sold easels and other paint supplies. (†) The boxes made it easier to carry paints to various locations indoors and out. They were works of art themselves but were bulky and must have weighed quite a bit. Perhaps plein air artists in the 1700 and 1800s had assistants to help them? This makes me truly grateful to have plastic bags and boxes to carry my paints in.
Packing Your Supplies
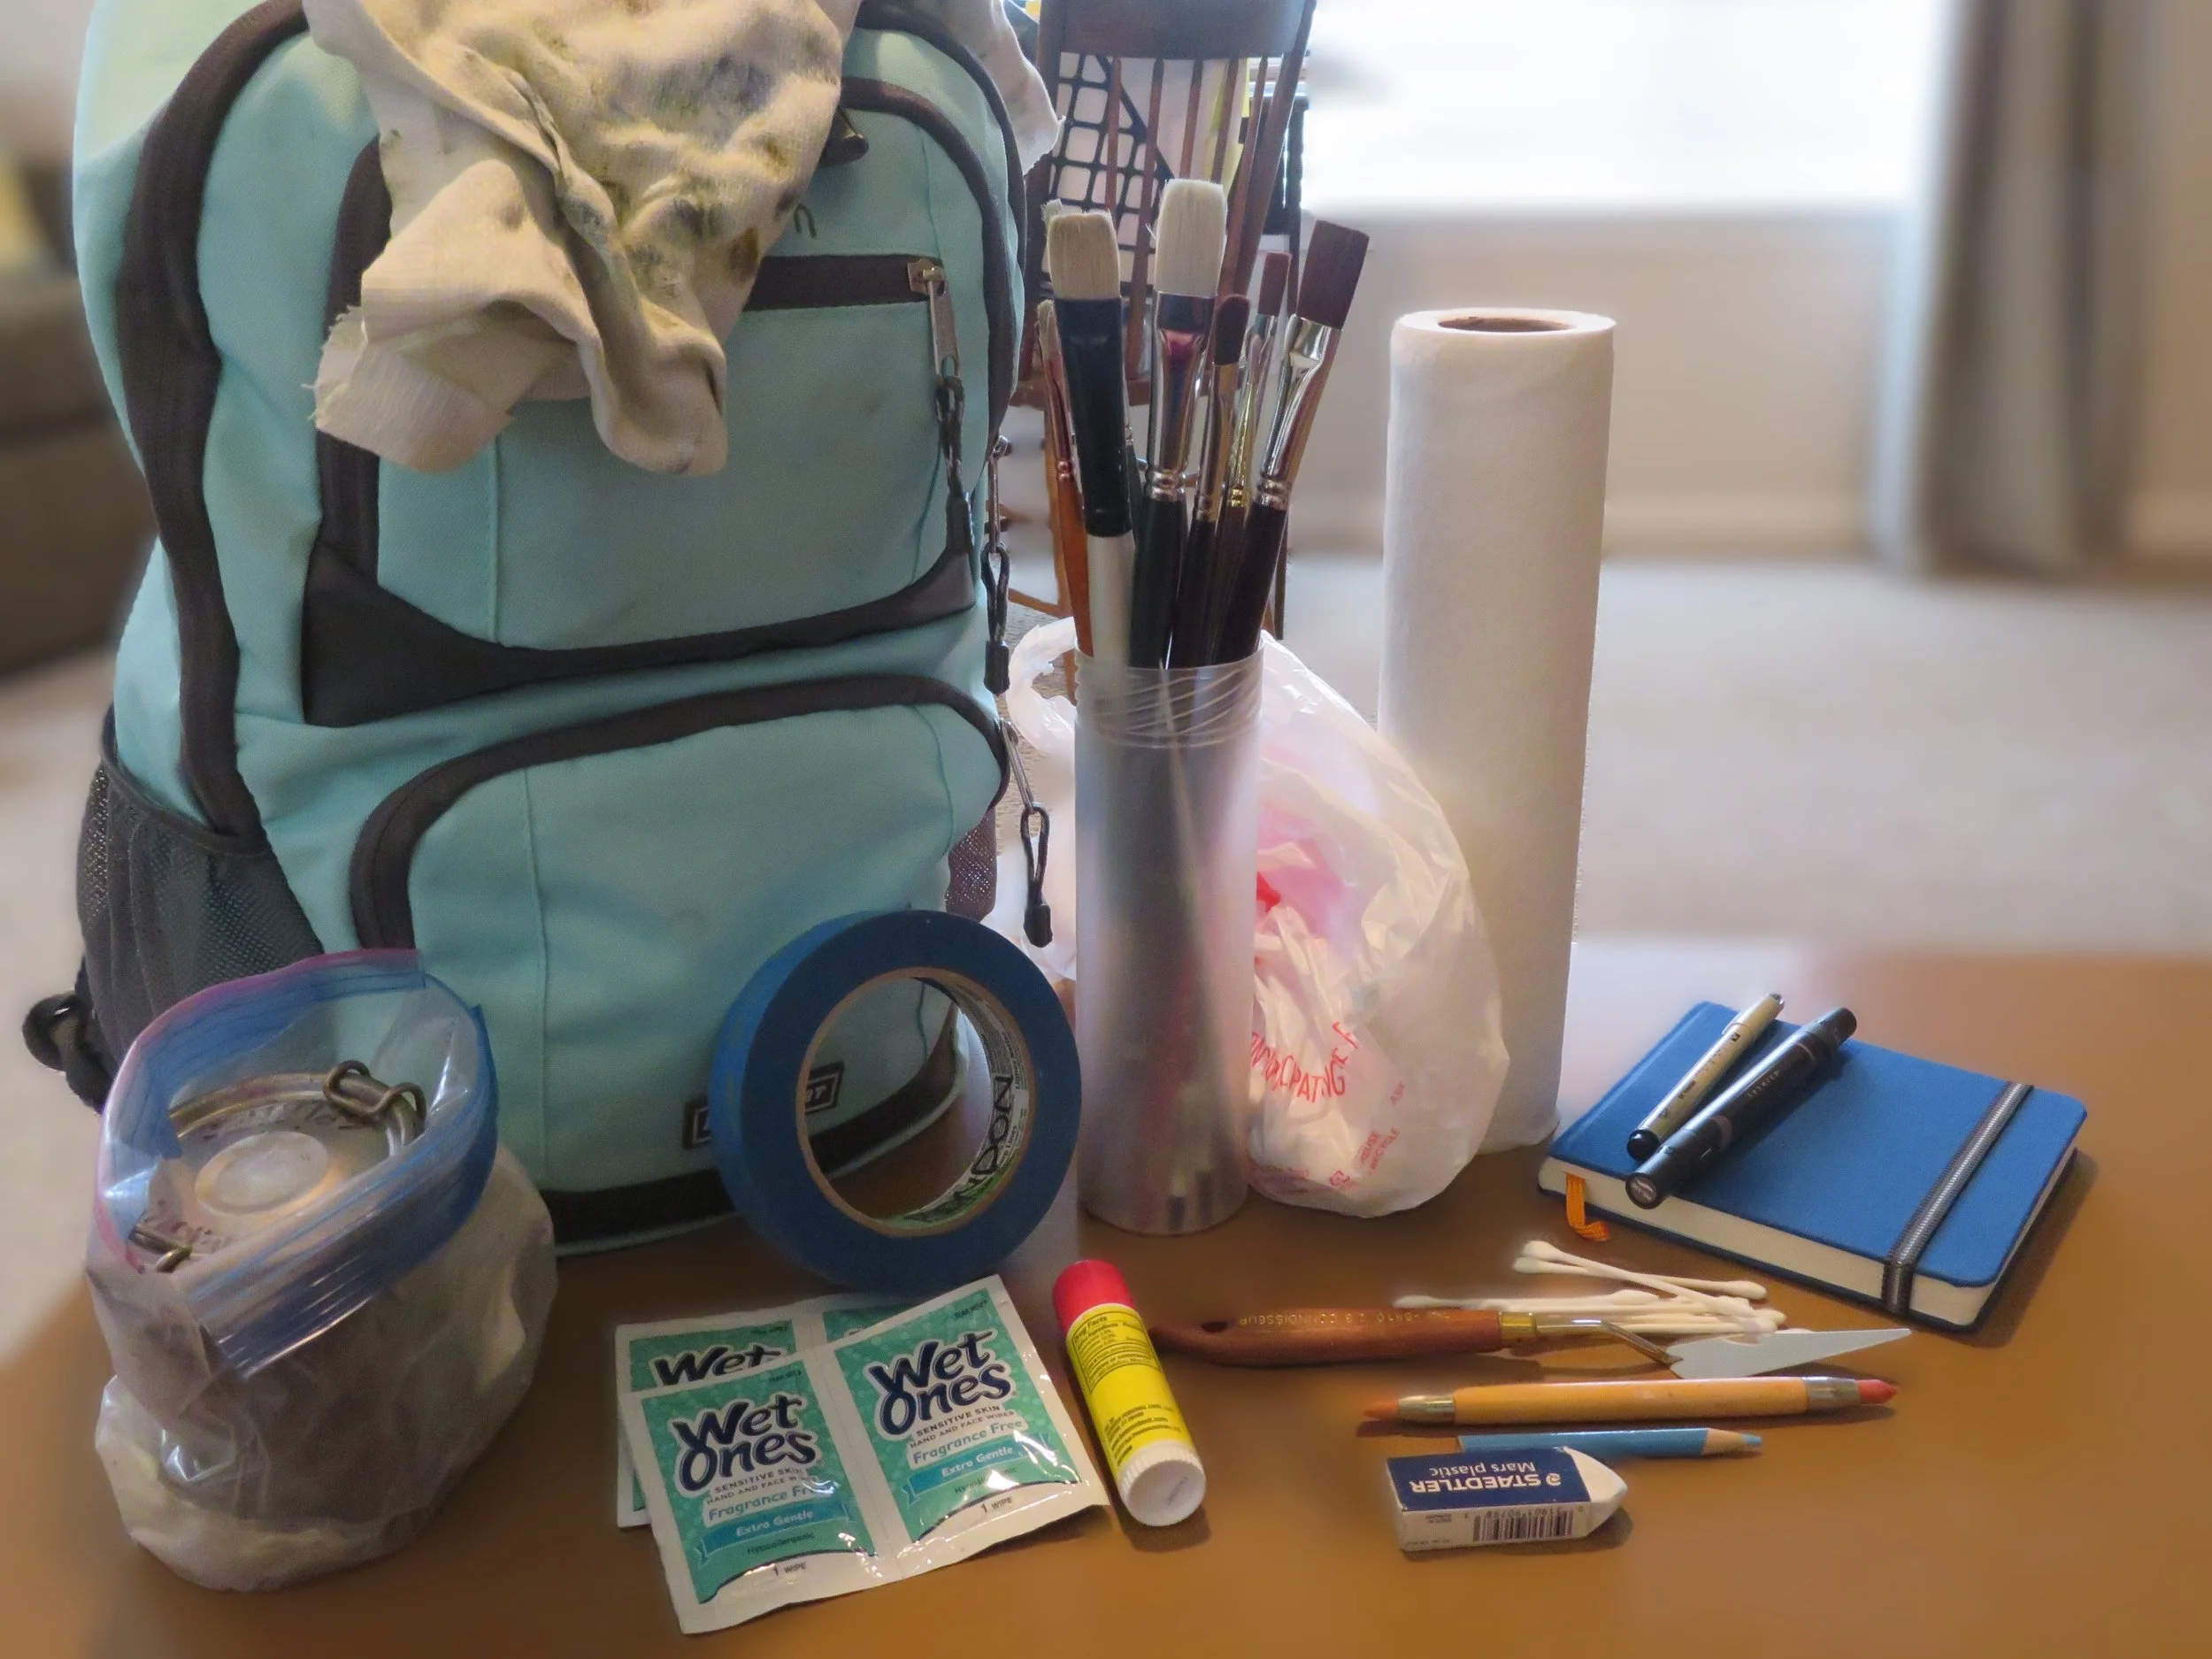
My favorite backpack has inside and outside pockets, and a couple zipped areas. In it are my paints, brushes, mineral spirits (or whatever fluids and mediums you use), rags and paper towels, small garbage bags, Q-Tips, palette knife, pencil and pen, sketch pad, hand wipes, and more.
Let’s talk about packing your basic items, and what to consider for your backpack. My favorite backpack has inside and outside pockets, and a couple zipped areas. In it are my paints, brushes, mineral spirits (or whatever fluids and mediums you use), rags and paper towels, small garbage bags, Q-Tips, palette knife, pencil and pen, sketch pad, hand wipes, and more. Believe it or not, the weight of all this isn’t too bad. My tripod and stool (both are lightweight, compact & foldable) get hung from the backpack. Now the weight is adding up but is still absolutely doable.
Consider Paint Quantity
One more thing to consider is how many paints you bring. If you’re using watercolor, you’ll most likely have a paint box that has all the paints pre-dried in it and is lightweight plastic. Oil paint tubes do weigh a bit, and that can add up. Consider only carrying the basic colors you might need. Most colors you’ll need outside are mixable with a few primary warm and cool colors, and white. You’ll soon get used to having a limited choice. Often colors mixed by using fewer paints are brighter and more alive.
A Lesson in Self Confidence
The tale I’m sharing next was a big lesson in self confidence. One sunny day while in Tucson, Arizona I was painting on the side of a dusty road. No, I didn’t get run over by a carriage! Once I got in the “zone” and was liking my composition and colors, a jeep stopped by with a couple in it. The man immediately took off. Clearly, they were there to take a hike. The lady, however, stopped and was watching me paint for a while. At this point, the painting was in its ugly stage, just starting to become something. We chatted a bit. She then stated that her sister paints, and she just LOVES (she emphasized this, in fact) her work. She then abruptly left. It was difficult not to feel like my work didn’t come up to snuff, but after a short break and a good snack, it was back to painting for me! So never get discouraged, art is in the eye of the beholder, after all!
This article was meant to give you a plan to handle the hopes and challenges of plein air painting. It may test your patience and persistence, but keep painting! I wish you the best of luck.
Please look for my third blog article in this series, due out in March 2026.
Thank you,
Renee Rondon
(*), (†) David Bomford, Jo Kirby, John Leighton, Ashok Roy, Art in the Making - Impressionism